
Let’s be honest—there’s nothing more disappointing than biting into a sandwich only to have it collapse in your hands. Soggy bread. Sliding fillings. All the flavor packed into one side. 😩
The secret to the perfect bite? It’s not just ingredients—it’s layer order.
When you master creative layering, you get bold flavor in every bite, strong structure, and absolutely no soggy bread. Whether you’re building a towering club, a Mediterranean veggie stack, or a crispy katsu sando, the rules are surprisingly simple—and game-changing.
Let’s break down exactly how to build sandwiches that look Pinterest-perfect and taste even better.
Start With the Right Bread (And Toast It Smartly)
Bread is your foundation. If it’s weak, everything collapses.
Choose sturdy options like:
- Sourdough
- Ciabatta
- Whole grain
- Rye
- Thick-cut milk bread for soft Japanese-style sandwiches
💡 Pro tip: Lightly toast the inside surfaces only.
This creates moisture resistance while keeping the outside soft. Think of it as insurance against sogginess.
The slight crisp layer dramatically improves structure—especially if your sandwich includes juicy tomatoes or saucy spreads.
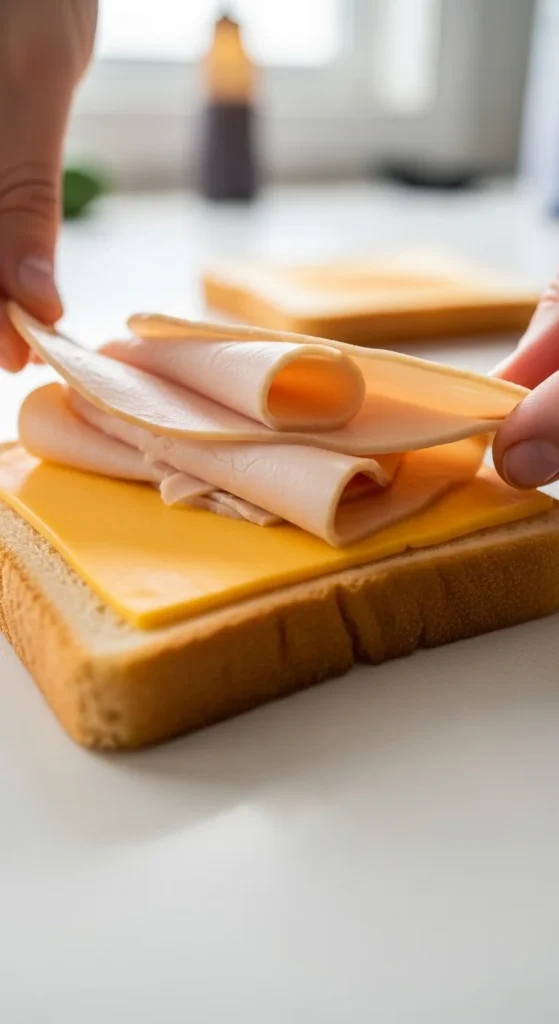
The Cheese Barrier Trick (Your Anti-Soggy Secret)
Here’s where sandwich science gets fun.
Placing cheese slices directly against the bread creates a moisture barrier. Cheese absorbs nearly twice as much moisture as lettuce, making it your first line of defense.
Think of it as edible insulation.
Cheese Protection Rankings (for moisture control):
- 🥇 American – melts well, excellent seal
- 🥈 Swiss – firm and protective
- 🥉 Cheddar – sturdy but slightly less flexible
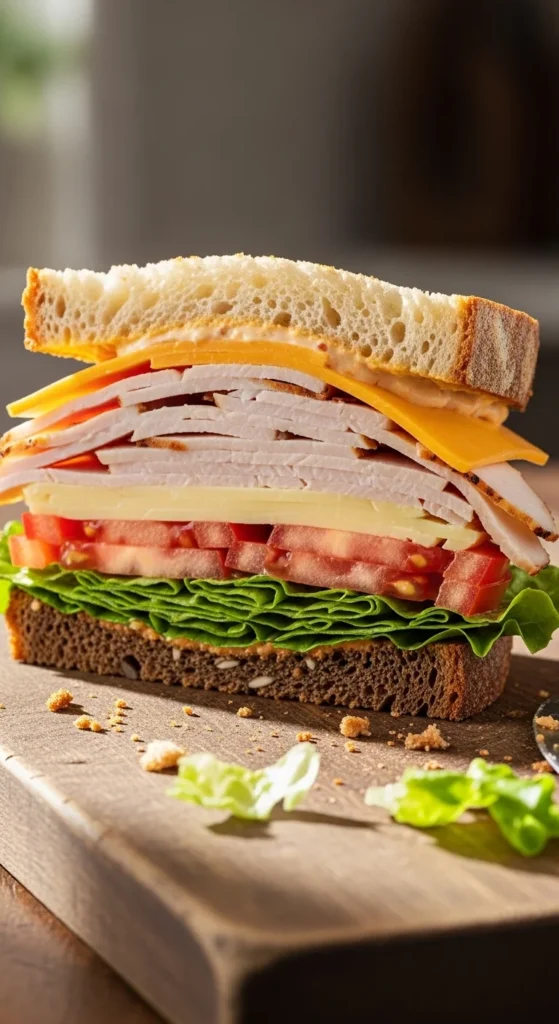
Layer order starter formula:
- Bread
- Cheese slice
- Protein
- Veggies
- Bread
This “cheese + protein barrier” duo prevents juices from soaking into the bread.
Spread Condiments on BOTH Sides
Most people make one big mistake: they only spread condiments on one slice.
Instead:
- Spread mayo, mustard, hummus, pesto, or fig jam evenly on both slices.
- Use the back of a spoon for a smooth, even coat.
- Keep it thin but complete—edge to edge coverage.
This creates:
- Balanced flavor
- Moisture lock
- No dry bites
Want to elevate things? Try:
- Hummus + feta + cucumber (Mediterranean vibes)
- Pesto + prosciutto + arugula
- Harissa mayo + grilled chicken
- Fig jam + brie + turkey
Creative spreads instantly upgrade a basic sandwich into something crave-worthy.
Master the Wet-Dry Alternation Rule
This is the golden rule of layering:
Never put wet ingredients directly against bread.
Instead, alternate textures.
Example structure:
- Bread
- Cheese
- Protein
- Lettuce (dry barrier)
- Tomato (wet)
- Onion (dry crunch)
- Pickles (wet but buffered)
Lettuce and protein act as shock absorbers between juicy tomatoes or pickles and the bread.
This simple switch can extend freshness and keep your sandwich intact for hours.
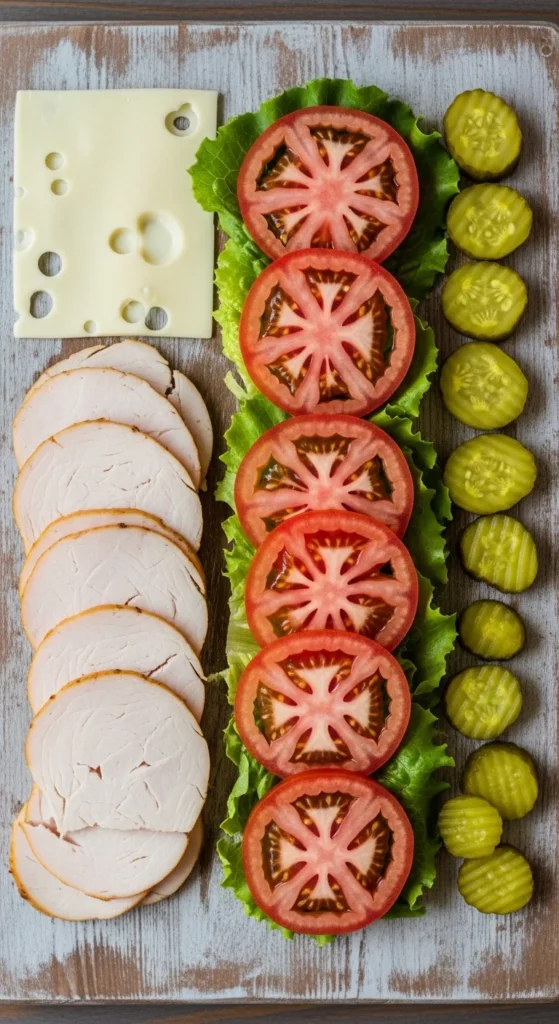
Anchor With Protein at the Bottom
Heavy meats or plant-based proteins should sit near the base.
Why?
They stabilize the entire stack and prevent sliding.
Great anchor options:
- Turkey slices
- Grilled chicken
- Tofu cutlets
- Crispy katsu
- Thick roasted vegetables
For extra stability, keep slices uniform—not too thick, not paper-thin.
This prevents the dreaded “ingredient avalanche” when you take a bite.
Add Crunch Last (And Protect It)
Crunch matters. It keeps every bite exciting.
But placement is everything.
Top your stack with:
- Lettuce
- Red onions
- Pickles
- Apple slices
- Walnuts (yes, really!)
Unexpected add-ins like pears or toasted nuts add sweet-savory contrast and texture depth.
Place crunch near the top so it doesn’t get crushed.
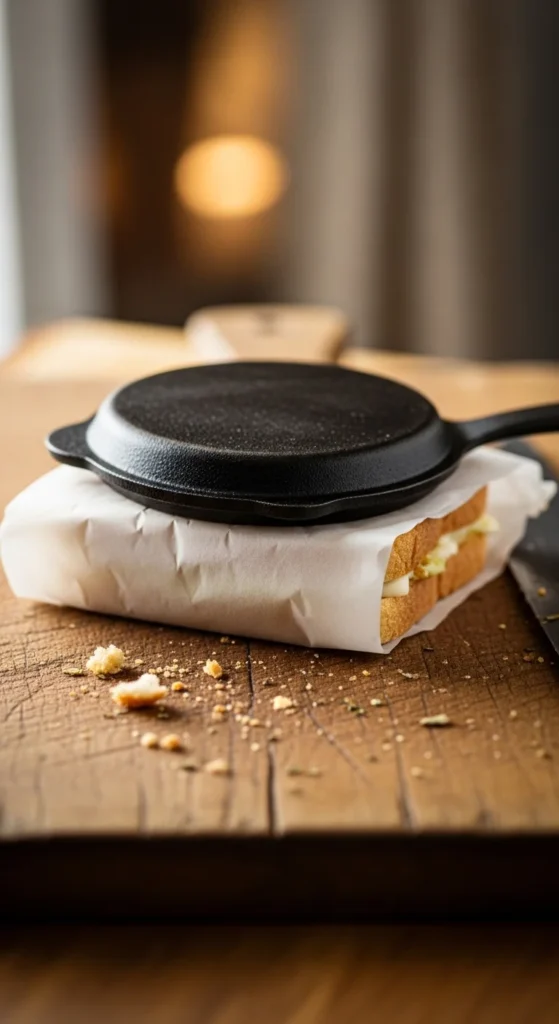
Press and Rest for 5–10 Minutes
This step is wildly underrated.
After assembling:
- Wrap your sandwich tightly in parchment paper.
- Press gently with your hands or a light weight.
- Let it rest for 5–10 minutes.
This compresses layers, melds flavors, and firms the structure.
For hot sandwiches? A panini press fuses everything into gooey unity. Just don’t over-press—you want melt, not flattening.
Cut Diagonally for the Perfect Bite
A 45-degree diagonal cut isn’t just aesthetic—it exposes layers beautifully and makes the sandwich easier to eat.
The visual payoff is huge:
- Clean layer reveal
- Better portion balance
- More satisfying bite
Triple-layer club? Repeat the bread-protein-cheese-veg pattern for height and drama.
Planning party minis? Remove crusts and use thinner layers for elegant finger sandwiches.
Creative Global Layer Ideas to Try
Feeling adventurous? Try these trending builds:
Mediterranean Stack
- Hummus
- Feta
- Cucumber
- Roasted red peppers
- Oregano
Japanese Katsu Sando
- Soft milk bread
- Crispy katsu
- Shredded cabbage
- Tonkatsu sauce
Thanksgiving Leftover Club
- Turkey
- Stuffing
- Cranberry sauce
- Lettuce
- Mayo
Sweet-Savory Crunch Combo
- Turkey
- Brie
- Apple slices
- Walnuts
- Honey mustard
Each follows the same layering principles—barriers, balance, structure.
Common Layering Mistakes to Avoid
🚫 Putting tomatoes directly on bread
🚫 Skipping the cheese barrier
🚫 Overloading wet condiments
🚫 Using flimsy bread
🚫 Forgetting to press before slicing
Small adjustments = massive upgrade.
The Takeaway: Build for Balance
Creative layering transforms sandwiches from basic to unforgettable.
Remember:
- Toast lightly
- Cheese first
- Alternate wet and dry
- Anchor with protein
- Add crunch at the top
- Press, then slice diagonally
When you follow this structure, every bite delivers flavor, texture, and stability.
Now it’s your turn—layer boldly, experiment with spreads, and build your own perfect stack.
And don’t forget…
📌 Save this for later and layer now!

Leave a Reply