
There’s a special kind of comfort that comes from baking bread at home. The smell alone can fill your entire kitchen with warmth, anticipation, and a little bit of pride. And when the recipe works every single time? That’s when homemade bread becomes part of your weekly routine.
The good news is that classic bread doesn’t require fancy techniques—just a few reliable steps that bakers have trusted for generations. With warm water, properly activated yeast, and a simple knead-and-rise process, you can create a soft, golden loaf that slices beautifully and tastes even better.
Once you learn the method, you’ll realize why this recipe truly never fails.
Simple Ingredients That Build Perfect Bread
Classic bread uses pantry basics, but each ingredient has an important job.
Here’s what you’ll need:
- 2 ¼ teaspoons active dry yeast
- 1 cup warm water (about 110°F / 45°C)
- 2 tablespoons sugar or honey
- ¼ cup vegetable oil
- 1 ½ teaspoons salt
- 4–6 cups flour (all-purpose or bread flour)
Optional but helpful:
- Butter for brushing the crust
- Extra flour for kneading
Why these ingredients matter:
- Yeast creates the rise and airy structure.
- Sugar or honey feeds the yeast and helps browning.
- Oil keeps the bread soft and tender.
- Salt balances flavor and strengthens the dough.
Step 1: Bloom the Yeast the Right Way
The most important step in foolproof bread is activating the yeast properly.
In a large bowl:
- Pour in the warm water (about 110°F).
- Stir in the sugar or honey.
- Sprinkle the yeast on top.
Let it sit for 5–10 minutes.
You should see:
- Foam forming
- Small bubbles
- A light yeasty aroma
This tells you the yeast is alive and ready to work. If nothing happens, the water may have been too hot or the yeast too old.
This step sets the foundation for a loaf that rises beautifully.
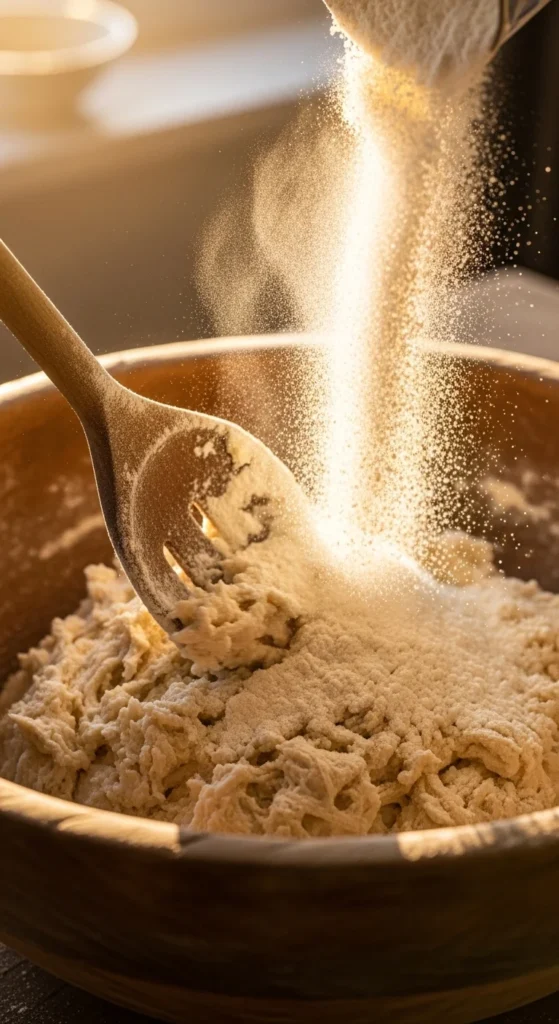
Step 2: Build the Dough Gradually
Once the yeast mixture is bubbly, mix in:
- Vegetable oil
- Salt
- 2 cups of flour
Stir until a soft batter forms.
Then begin adding flour slowly, about ½ cup at a time.
A helpful trick is the clean bowl test. The dough is ready when:
- It pulls away from the sides of the bowl
- It still feels slightly soft
- It’s not dry or crumbly
Most batches land between 4 and 6 cups of flour, depending on humidity and flour type.
Step 3: Knead Until Smooth and Elastic
Turn the dough onto a lightly floured surface.
Knead for 7–10 minutes.
Push the dough forward with the heel of your hand, fold it back, rotate, and repeat.
You’ll notice the dough transform:
- Sticky becomes smooth
- Rough becomes elastic
- Soft becomes structured
A good test is the windowpane test. Stretch a small piece of dough. If it forms a thin sheet without tearing, the gluten has developed properly.
Kneading is what creates that classic soft bread texture.
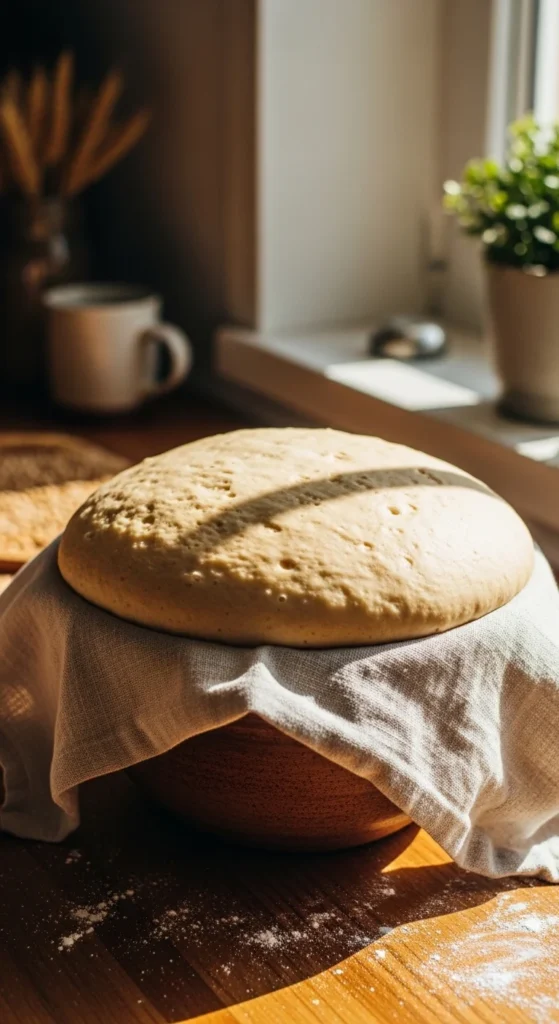
Step 4: The First Rise (Where the Magic Happens)
Place the dough into a lightly oiled bowl and turn it once to coat.
Cover with:
- A damp cloth, or
- Plastic wrap
Let it rise in a warm place for about 1 hour, or until it doubles in size.
Warm environments help yeast grow faster, which builds air pockets inside the dough.
You’ll know it’s ready when you press a finger lightly into the dough and the indentation slowly springs back.
Step 5: Shape the Loaf
Punch the dough down gently to release excess air.
Transfer it to the counter and knead lightly for about one minute.
Then shape it into a loaf.
Place it into a greased 9×5 loaf pan.
Cover again and let it rise for 30 minutes, until the dough rises about an inch above the rim of the pan.
This second rise gives bread its classic shape and light texture.
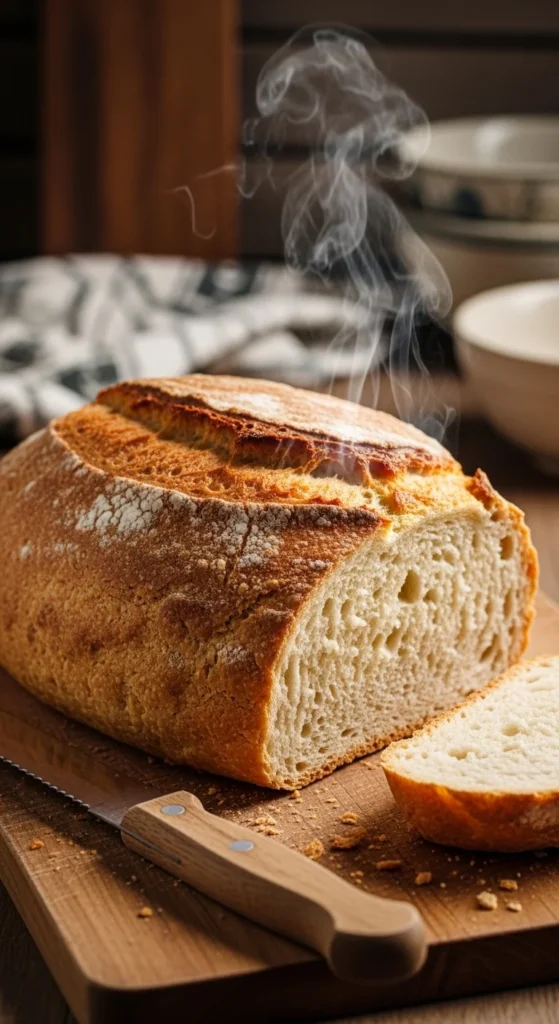
Step 6: Bake Until Golden and Hollow
Preheat your oven to 350°F (175°C).
Bake the loaf for 30–40 minutes.
You’ll notice:
- A deep golden crust
- A rich bread aroma filling your kitchen
To check doneness, tap the top of the loaf.
If it sounds hollow, it’s ready.
You can also check that the inside temperature reaches around 190–200°F.
Right after baking, brush the top lightly with butter for a soft, shiny crust.

Common Bread Problems (And How to Fix Them)
Even simple bread can go wrong sometimes. Here are easy fixes.
Bread didn’t rise
Possible causes:
- Water too hot or too cold
- Old yeast
- Cold kitchen
Fix:
Use fresh yeast and keep the dough in a warm place.
Dense or heavy loaf
Cause:
- Too much flour
- Not enough kneading
Fix:
Stop adding flour once the dough passes the clean bowl test.
Dry bread
Cause:
- Overbaking
- Too little fat
Fix:
Check bread at 30 minutes and brush with butter after baking.
Helpful Tips for Even Better Bread
Once you master the basics, try these upgrades:
- Use bread flour for a chewier, bakery-style loaf.
- Let the dough rest overnight in the fridge for deeper flavor.
- Add seeds, herbs, or garlic for variety.
- Bake two loaves and freeze one for later.
Homemade bread freezes beautifully and tastes fresh once toasted.
Final Thoughts
Baking bread from scratch might seem intimidating at first, but this classic method proves it doesn’t have to be complicated. With properly bloomed yeast, a good knead, and a patient rise, you’ll get a soft, golden loaf that works every single time.
And once you pull that warm bread from the oven, slice into it, and add a little butter—you’ll understand why homemade bread has remained a kitchen favorite for generations.
Save this recipe for later, because once you make it, you’ll want to bake it again and again.

Leave a Reply