
There’s something deeply satisfying about slicing into a chicken breast and hearing that faint crackle from a perfectly golden crust. Pan-searing sounds fancy, but it’s one of the simplest ways to cook chicken that tastes restaurant-level at home—no oven, no special gear, just a skillet and a little confidence.
This guide walks you through the process step by step, so you get juicy chicken inside and a crisp, golden exterior every single time.
Why Pan-Searing Works So Well
Pan-searing uses direct heat to create browning on the surface of the chicken. That browning equals flavor. When done right, you get:
- A golden crust with deep savory notes
- Moist, tender meat inside
- A fast cooking method perfect for busy nights
Once you learn the rhythm, this becomes a go-to technique you’ll use again and again.
Choose the Right Chicken Breast
Not all chicken breasts behave the same in the pan. A few small choices make a big difference.
Look for:
- Boneless, skinless chicken breasts
- Medium thickness, or ones you can easily even out
- Similar size pieces so they cook evenly
If one side is much thicker, gently pound it so the breast has a more even shape. This helps the chicken cook through without burning the outside.
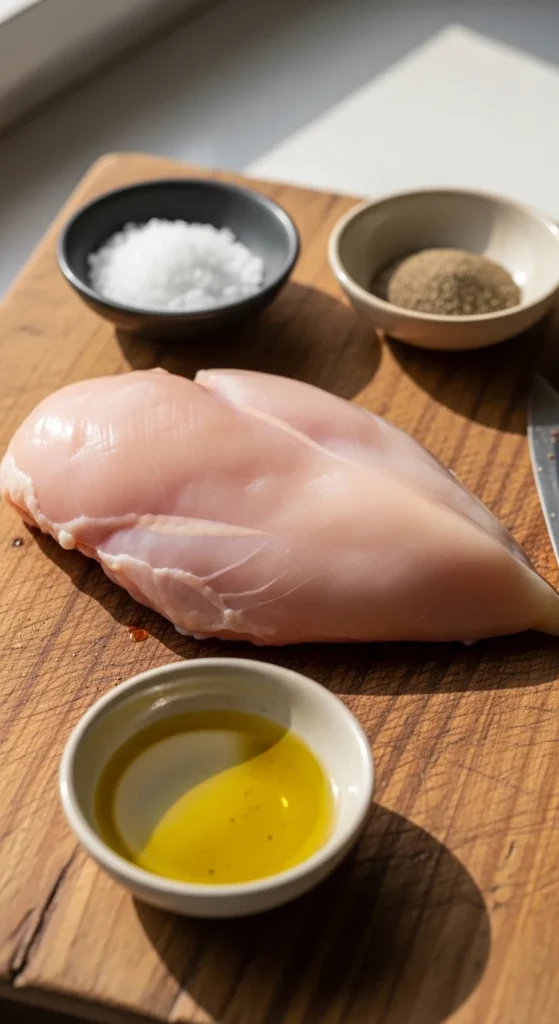
Prep for That Golden Crust
Before the chicken ever hits the pan, a little prep sets you up for success.
Key steps:
- Pat the chicken completely dry with paper towels
- Season generously with salt and pepper on both sides
- Let it sit at room temperature for 10–15 minutes
Dry chicken browns better. Moisture creates steam, and steam is the enemy of crisp edges.

Heat the Pan Properly
A hot pan is non-negotiable for a golden crust.
Here’s how to get it right:
- Use a heavy skillet, like stainless steel or cast iron
- Heat the pan over medium-high for 2–3 minutes
- Add a tablespoon of oil with a high smoke point
You’ll know the pan is ready when the oil shimmers and moves easily across the surface.
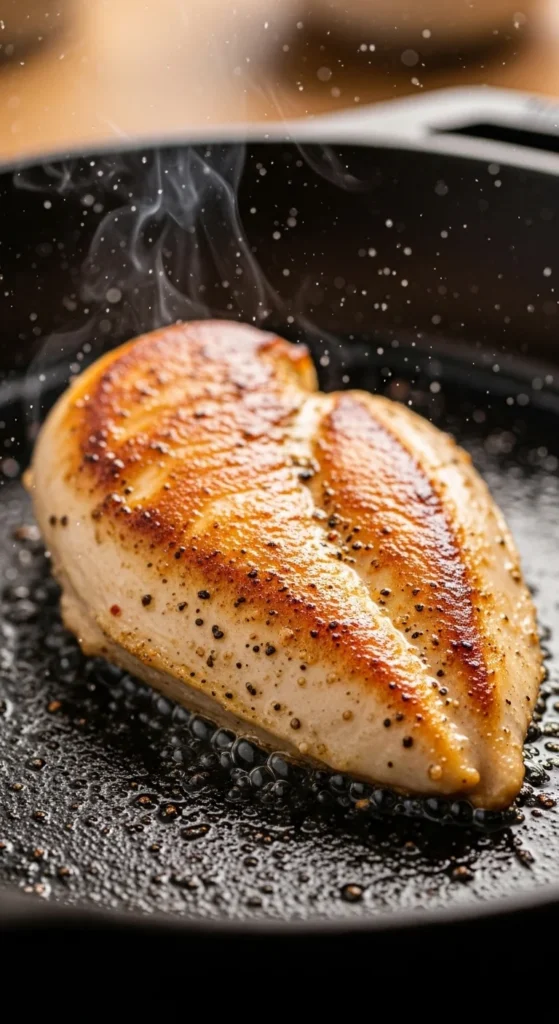
Sear Without Touching
This is the hardest part for most people—leave the chicken alone.
Carefully place the chicken breast in the pan, presentation side down. You should hear a strong sizzle right away.
Then:
- Don’t move it for 5–7 minutes
- Let the crust form naturally
- Flip only when it releases easily from the pan
If it sticks, it’s not ready yet.
Finish Cooking Gently
After flipping, the second side usually cooks faster.
- Cook another 4–6 minutes
- Reduce heat slightly if the pan gets too hot
- Press gently to check firmness
The chicken should feel springy but not hard. If you use a thermometer, aim for 165°F in the thickest part.
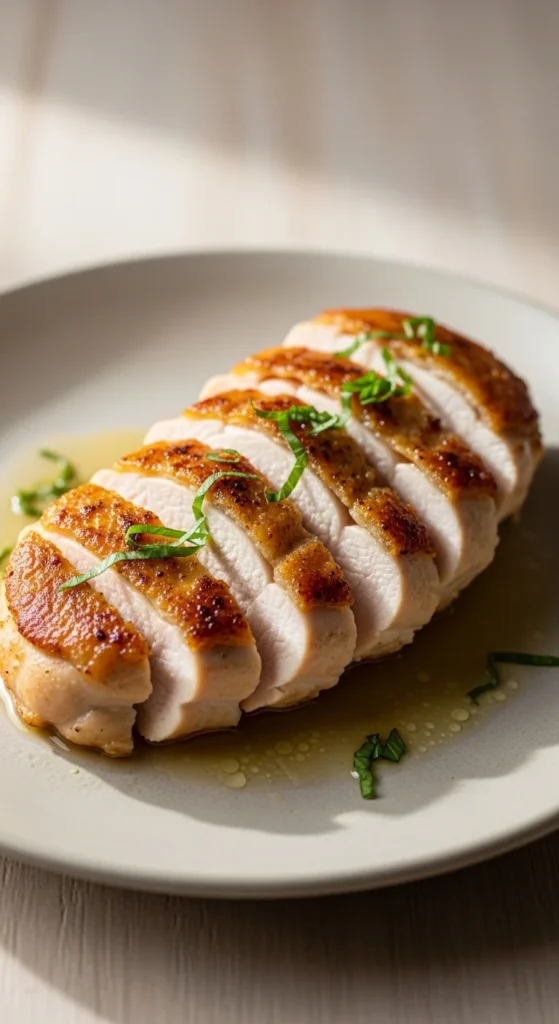
Rest Before Slicing
This step is quick but powerful.
Once cooked:
- Transfer chicken to a plate
- Let it rest for 5 minutes
- Slice against the grain
Resting allows the juices to settle back into the meat instead of running out onto the plate.
Simple Flavor Add-Ons
Pan-seared chicken is a blank canvas. You can keep it simple or dress it up with ease.
Quick ideas:
- Add a knob of butter and garlic to the pan at the end
- Finish with lemon juice and chopped herbs
- Spoon pan drippings over the sliced chicken
These small touches add depth without complicating the process.
Common Mistakes to Skip
Even experienced cooks slip up sometimes. Keep these in mind:
- Crowding the pan, which lowers the heat
- Flipping too early
- Using low heat and hoping for browning
- Skipping the resting step
Fixing these alone can completely change your results.
Make It Part of Your Weekly Routine
Once you master pan-seared chicken breast, you’ll find endless ways to use it—salads, wraps, grain bowls, pasta, or simple dinners with veggies on the side. It’s fast, reliable, and always satisfying.
Save this method for later, grab your skillet, and enjoy that golden crust tonight. 🍳✨

Leave a Reply