
If you’ve ever dreamed of pulling a golden, crackly sourdough loaf out of your oven—the kind with a blistered crust and an airy, chewy interior—you’re not alone. Sourdough has become the bread everyone wants to master, but the process can feel intimidating… until now. With the right steps and a little patience, you can make a loaf so good people won’t believe it came from your kitchen.

This foolproof recipe breaks everything down into simple, stress-free instructions perfect for beginners and seasoned bakers alike.
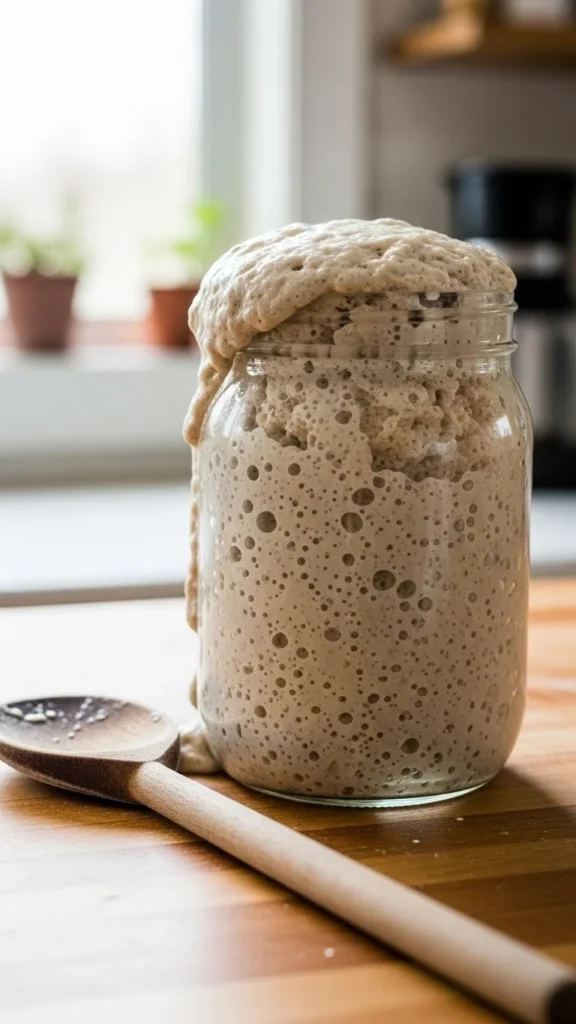
Start With a Strong Sourdough Starter
A happy starter is the foundation of every great sourdough loaf. If your starter is bubbly and active, the rest of the process becomes incredibly rewarding.
1. Know When Your Starter Is Ready
Your starter should:
- Double in size within 4–6 hours
- Smell pleasantly tangy
- Have lots of visible bubbles
A weak starter = flat bread, so don’t rush this step.
2. Feed It Properly
Use a simple ratio:
- 1 part starter
- 1 part flour
- 1 part water
Example: 50g starter + 50g flour + 50g water.
Let it rest at room temperature until lively.
Build the Dough: Hydration, Flour, and Salt
The magic of sourdough comes from just four ingredients: flour, water, salt, and starter. But balance matters.
1. Use Good Flour
Strong bread flour makes the dough elastic.
You can mix:
- 70% bread flour
- 30% whole wheat flour
This adds flavor, color, and structure.
2. Hydrate Your Dough Well
Sourdough loves water. Start with 70–75% hydration for easy handling.
Example for 500g flour:
- 350–375g (ml) water
Hydrated dough creates a soft, open crumb.
3. Add the Starter and Salt at the Right Time
Combine:
- Flour
- Water
- Starter
Let it rest (this rest is called autolyse).
Then knead in the salt. This improves stretchiness and hydration.
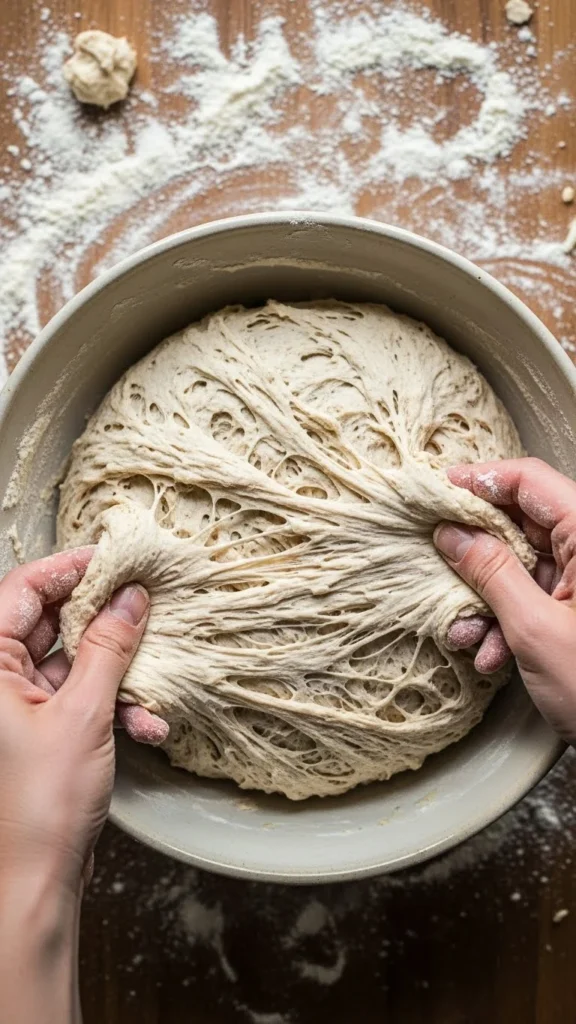
Master the Stretch-and-Fold Technique
Unlike traditional kneading, sourdough relies on gentle handling.
1. Perform 4 Rounds of Stretch-and-Fold
Every 30 minutes for 2 hours:
- Grab one side of the dough
- Stretch it upward
- Fold it over
- Rotate the bowl and repeat
This builds gluten without overworking it.
2. Watch the Dough Transform
After several rounds, the dough becomes:
- Smooth
- Elastic
- Puffy
This is exactly what you want.
Let the Dough Rise Slowly
Sourdough flavor develops over time, and a slow rise creates depth.
1. Bulk Fermentation
Let the dough rise at room temperature for:
- 4–6 hours (depending on warmth)
It should increase by 50–70%—not necessarily double.
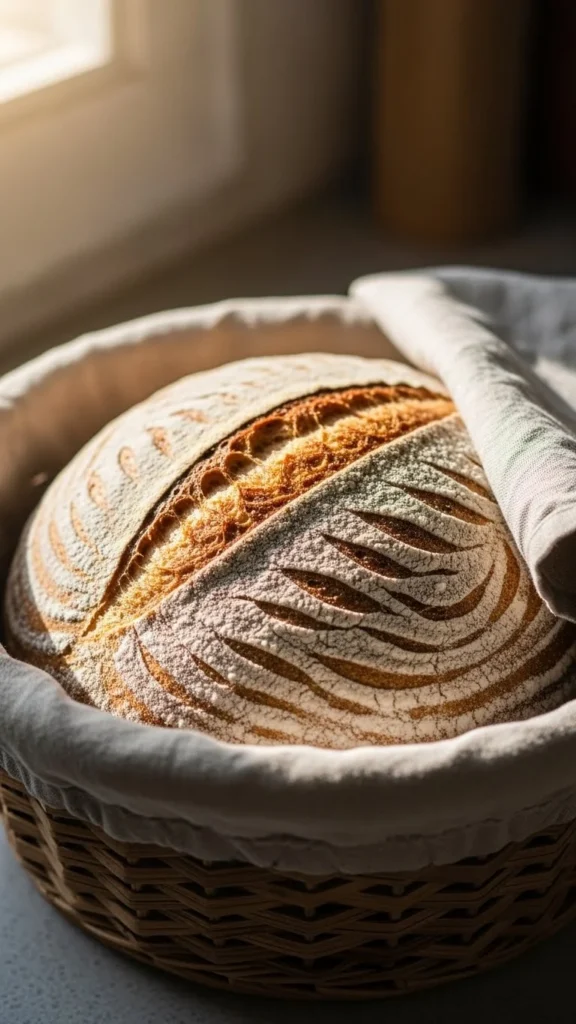
2. Shape With Confidence
Gently shape the dough into a round loaf:
- Fold the edges inward
- Flip it seam-side down
- Tuck gently to build tension
3. Overnight Rise (The Secret Step!)
Place the dough in a floured banneton or bowl, cover, and refrigerate for 8–12 hours.
This slow, cold fermentation:
- Creates intense flavor
- Strengthens the crust
- Makes the dough easier to score
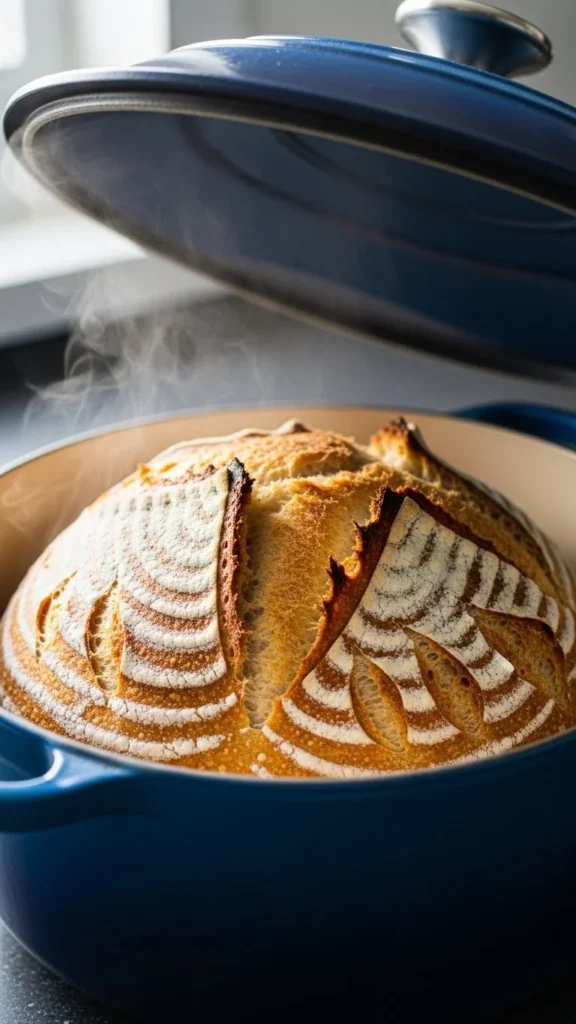
Bake Your Sourdough Like a Pro
The bake is where your loaf transforms from dough to art.
1. Preheat Your Oven and Dutch Oven
Heat to 475°F (246°C) with the Dutch oven inside.
The Dutch oven traps steam, mimicking bakery conditions.
2. Score the Dough
Turn the dough onto parchment.
Use a bread lame or sharp knife to cut a deep slash.
This allows the loaf to expand beautifully.
3. Bake in Two Stages
- Covered: 20–25 minutes (creates steam and rise)
- Uncovered: 20–25 minutes (deep golden crust)
Your loaf should sound hollow when tapped.
Troubleshooting Tips for Perfect Sourdough
Even foolproof recipes need guidance. Here’s how to fix common issues:
- Dense loaf? Starter wasn’t fully active.
- Too sticky? Add 1–2 tablespoons flour next time or lower hydration slightly.
- Flat loaf after baking? Shaping tension wasn’t strong enough.
- Too sour? Shorten fermentation or refrigerate less time.
Sourdough improves with practice, so don’t stress—every loaf teaches you something.
Final Takeaway
Sourdough isn’t complicated—it’s just a rhythm. Feed, mix, fold, rest, shape, chill, and bake. Follow these steps, trust the process, and you’ll create bread so delicious and beautiful that everyone will ask for your recipe.
Save this recipe for later and start your sourdough journey today—your kitchen will smell amazing! 🥖✨

Leave a Reply